Fork Workflow
The Fork workflow is the standard way to contribute to open-source projects. The core idea: you don't modify the original repository directly — you work on your own copy and submit changes via Pull Request.
Why You Can't Commit Directly to the Main Repository
Many beginners ask: I have write access, why can't I just push?
The reasons are simple:
- The main repository is shared by everyone — your unreviewed code could break the project
- Without Code Review, quality cannot be guaranteed
- Others can't know what you're working on, leading to conflicts
- The project history becomes chaotic
Anti-Pattern
Committing directly to the main branch of the main repository is the most common and most serious contribution mistake. Even if you are a project collaborator, you should contribute code through the Fork + PR workflow.
Complete Workflow Overview
Original Repository (upstream)
    │
    ├── 1. Fork ──→ Your Repository (origin)
    │                    │
    │                    ├── 2. Clone to local machine
    │                    │
    │                    ├── 3. Create a feature branch
    │                    │
    │                    ├── 4. Write code + Commit
    │                    │
    │                    ├── 5. Push to origin
    │                    │
    │                    └── 6. Create Pull Request ──→ Original Repository
    │
    └── 7. Review & Merge
Step 1: Fork the Repository
Open the project you want to contribute to on GitHub and click the Fork button in the top-right corner.
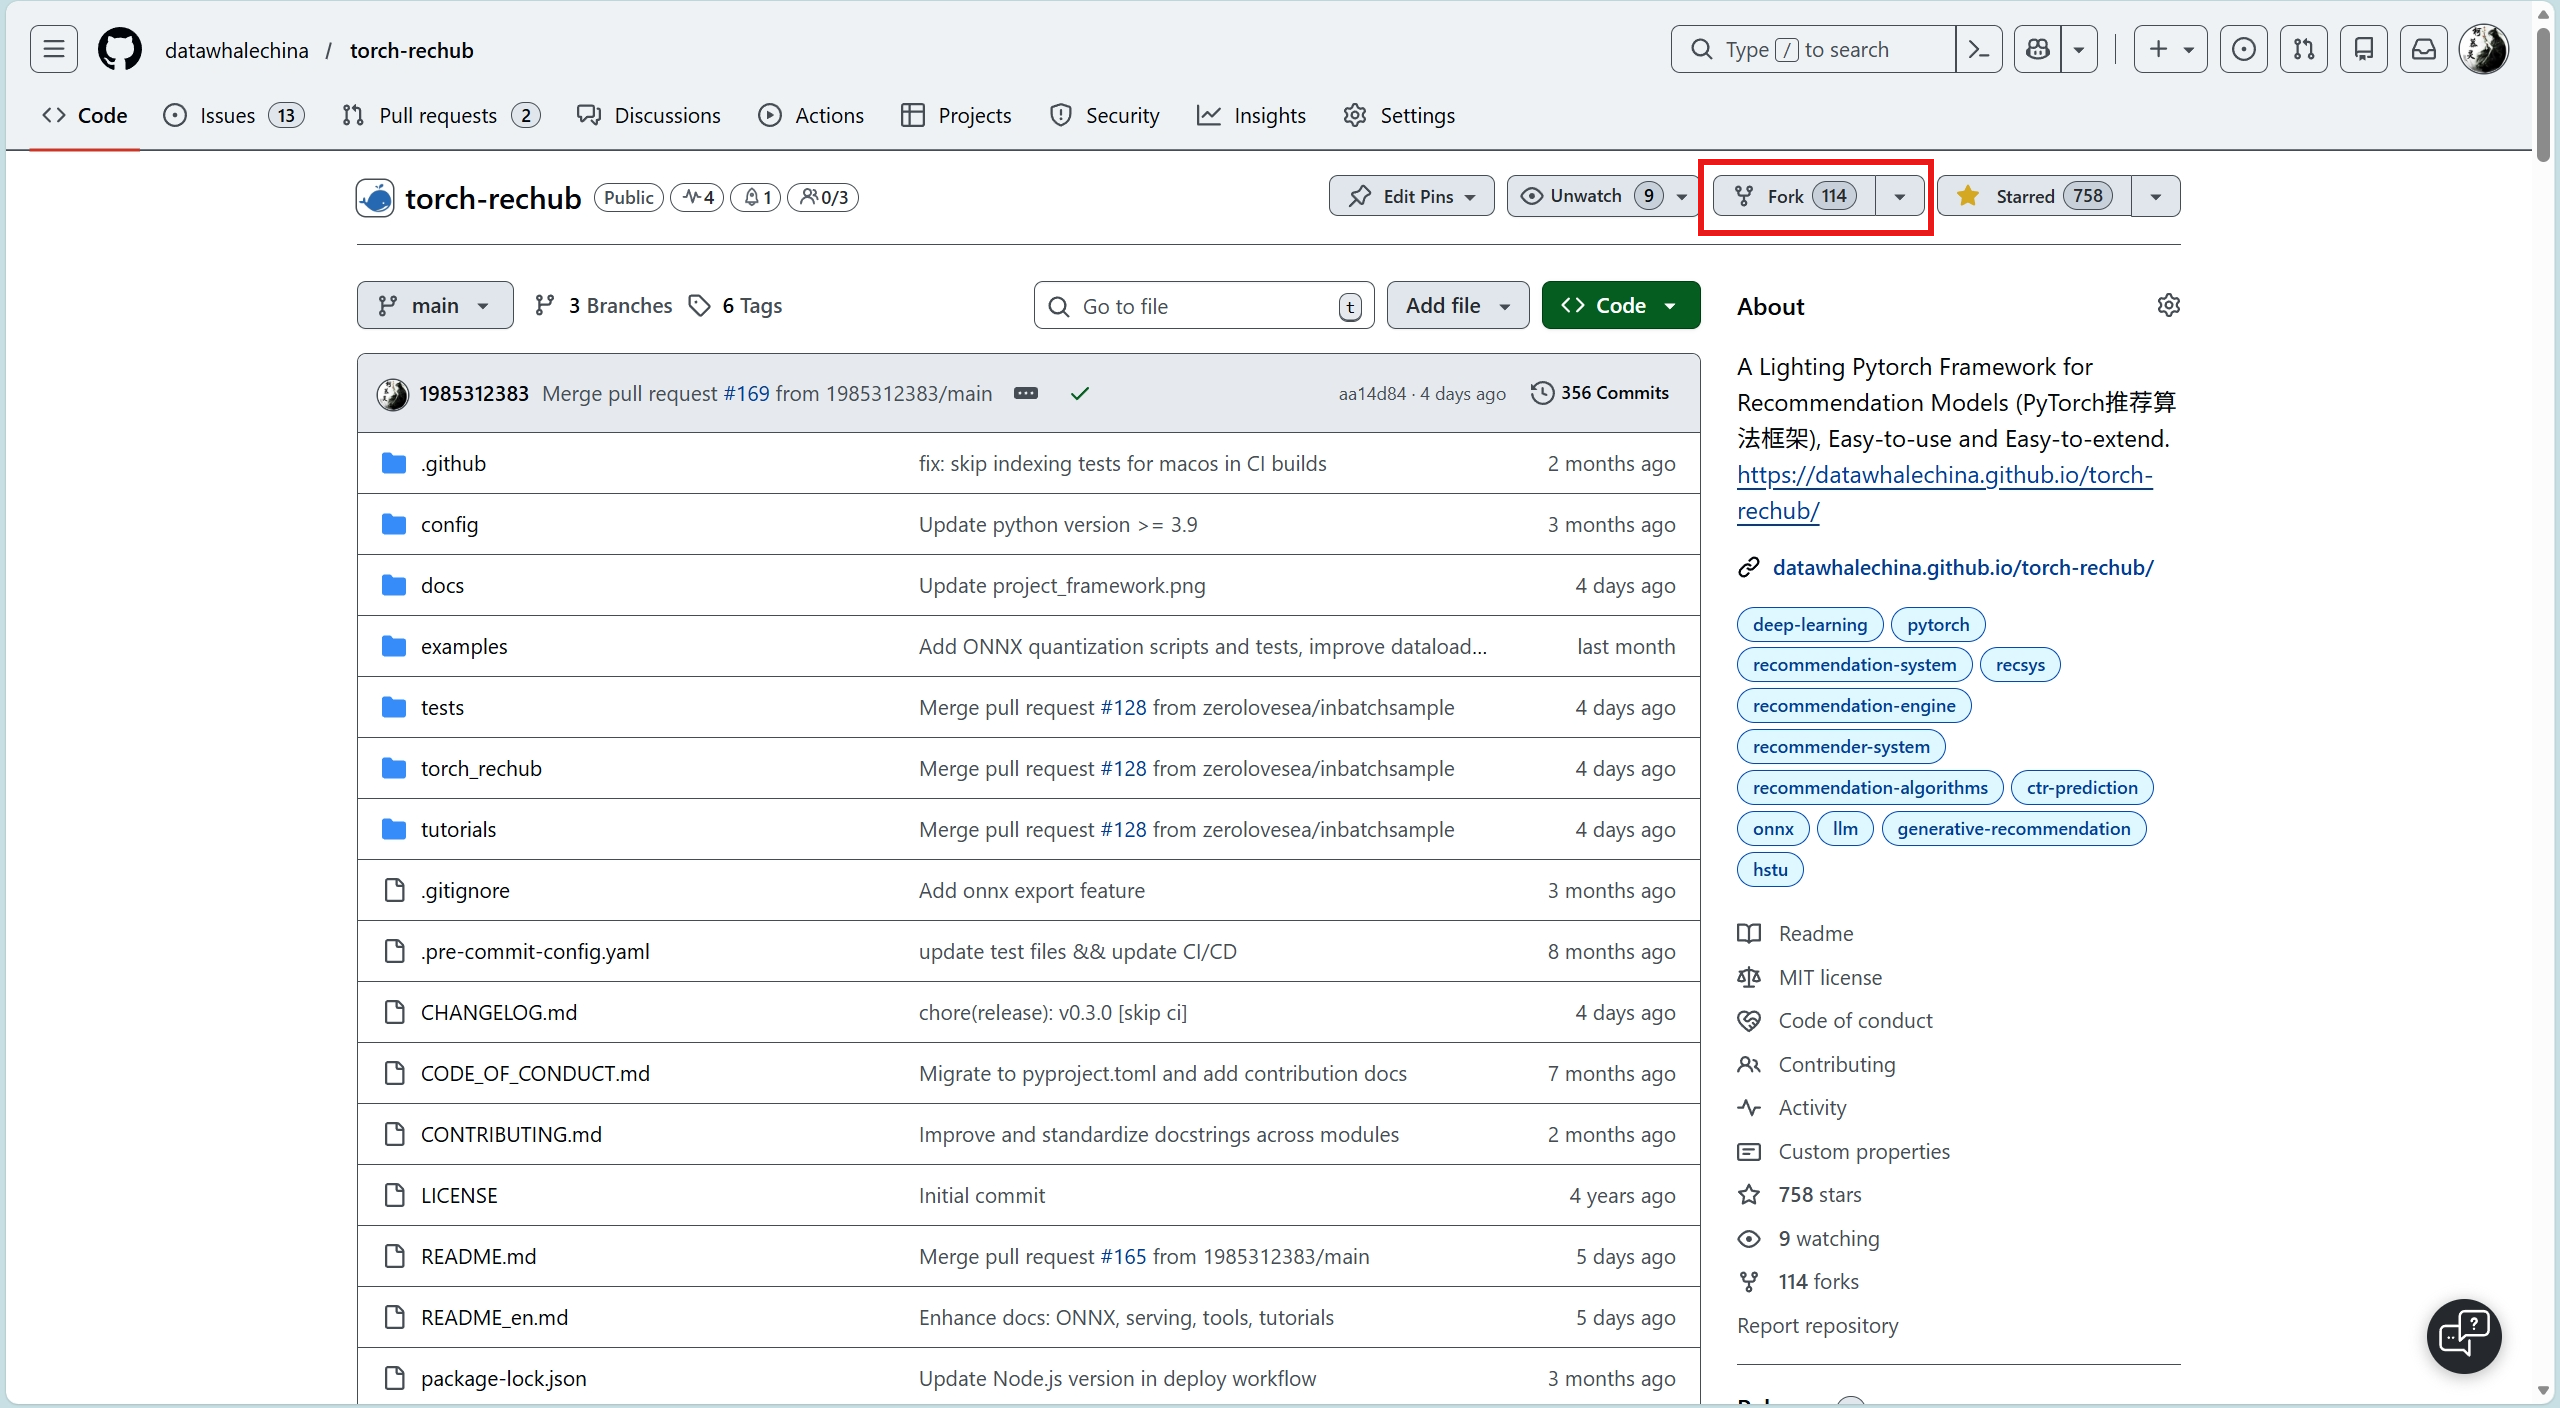

After forking, a copy of the repository will appear under your GitHub account, in the format your-username/project-name.
Step 2: Clone to Your Local Machine
# Clone your forked repository (not the original)
git clone https://github.com/your-username/project-name.git
cd project-name1. Open GitHub Desktop
2. Click File → Clone Repository
3. Find your forked repo in the list, or paste the repo URL
4. Choose a local path, then click CloneStep 3: Add the Upstream Remote
# Add the original repository as upstream
git remote add upstream https://github.com/original-org/project-name.git

# Verify remote configuration
git remote -v
# origin    https://github.com/your-username/project-name.git (fetch)
# origin    https://github.com/your-username/project-name.git (push)
# upstream  https://github.com/original-org/project-name.git (fetch)
# upstream https://github.com/original-org/project-name.git (push)GitHub Desktop automatically detects the fork relationship.
After cloning, you can access upstream via:
Branch → Merge into current branch → select upstream/main
GitHub Desktop will automatically set the original repo as upstream.Step 4: Create a Feature Branch
# Make sure you are on the main branch and synced with upstream
git checkout main
git fetch upstream
git merge upstream/main

# Create and switch to a new feature branch
git checkout -b feat/add-search-feature1. Make sure Current Branch (top-left) is main
2. Click Branch → New Branch
3. Enter a branch name, e.g. feat/add-search-feature
4. Click Create BranchBranch Naming Conventions
Use meaningful prefixes:
feat/xxx— New featurefix/xxx— Bug fixdocs/xxx— Documentation changesrefactor/xxx— Code refactoring
Step 5: Write Code and Commit
# After writing code, review your changes
git status
git diff

# Stage the files you modified (avoid using git add .)
git add src/search.js
git add docs/search.md

# Commit (follow commit conventions — see next chapter)
git commit -m "feat: add search functionality"1. After writing code, GitHub Desktop shows all changed files on the left
2. Check the files you want to commit (don't select unrelated files)
3. Click a file to view its diff
4. Enter a commit message in the Summary box at the bottom-left, e.g.:
feat: add search functionality
5. Click Commit to feat/add-search-featureNote
- Do not use
git add .orgit add -A— stage files individually - Each commit should do one thing only; don't mix unrelated changes
- Commit messages must be meaningful — see Commit Conventions
Step 6: Push to Your Repository
git push origin feat/add-search-featureAfter committing, click the Push origin button at the top.
If this is the first push for a new branch, the button will show Publish branch.Step 7: Create a Pull Request
After pushing, open GitHub and you will see a prompt banner. Click Compare & pull request.
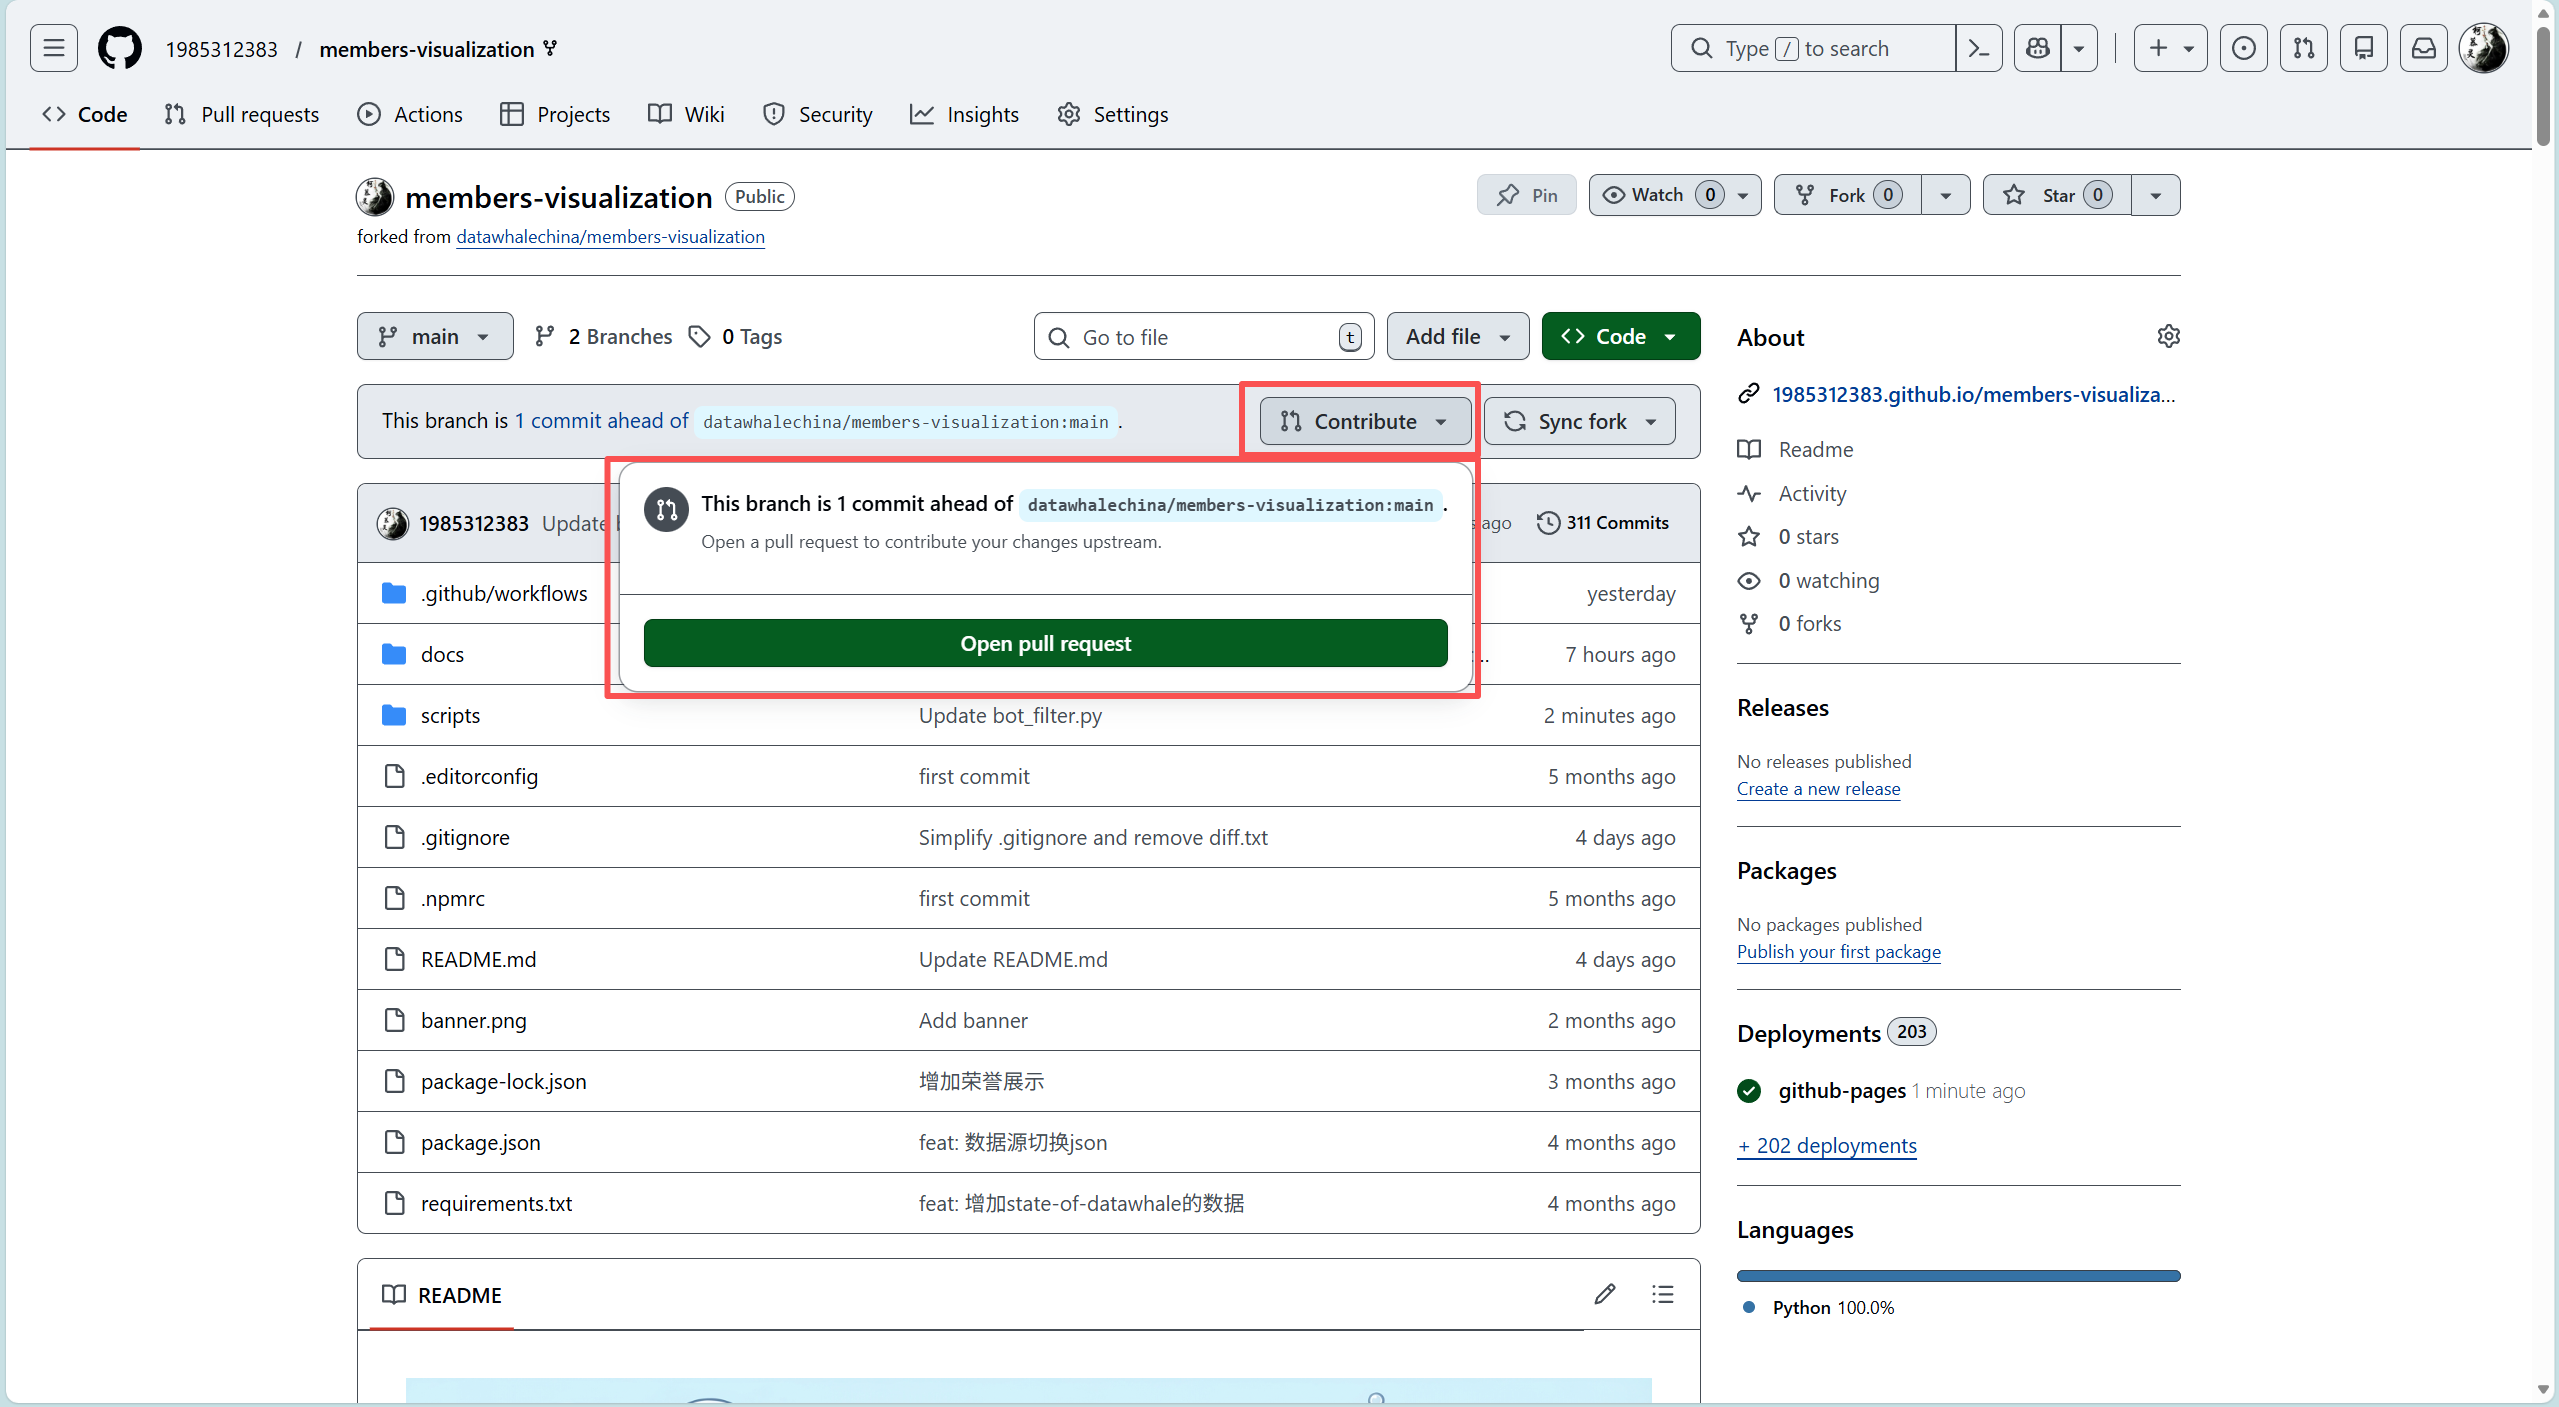
Fill in the PR details (see Pull Request Standards), then click Create pull request.
Keeping in Sync with Upstream
While you are working, the original repository may have received new commits. You need to sync periodically:
git checkout main
git fetch upstream
git merge upstream/main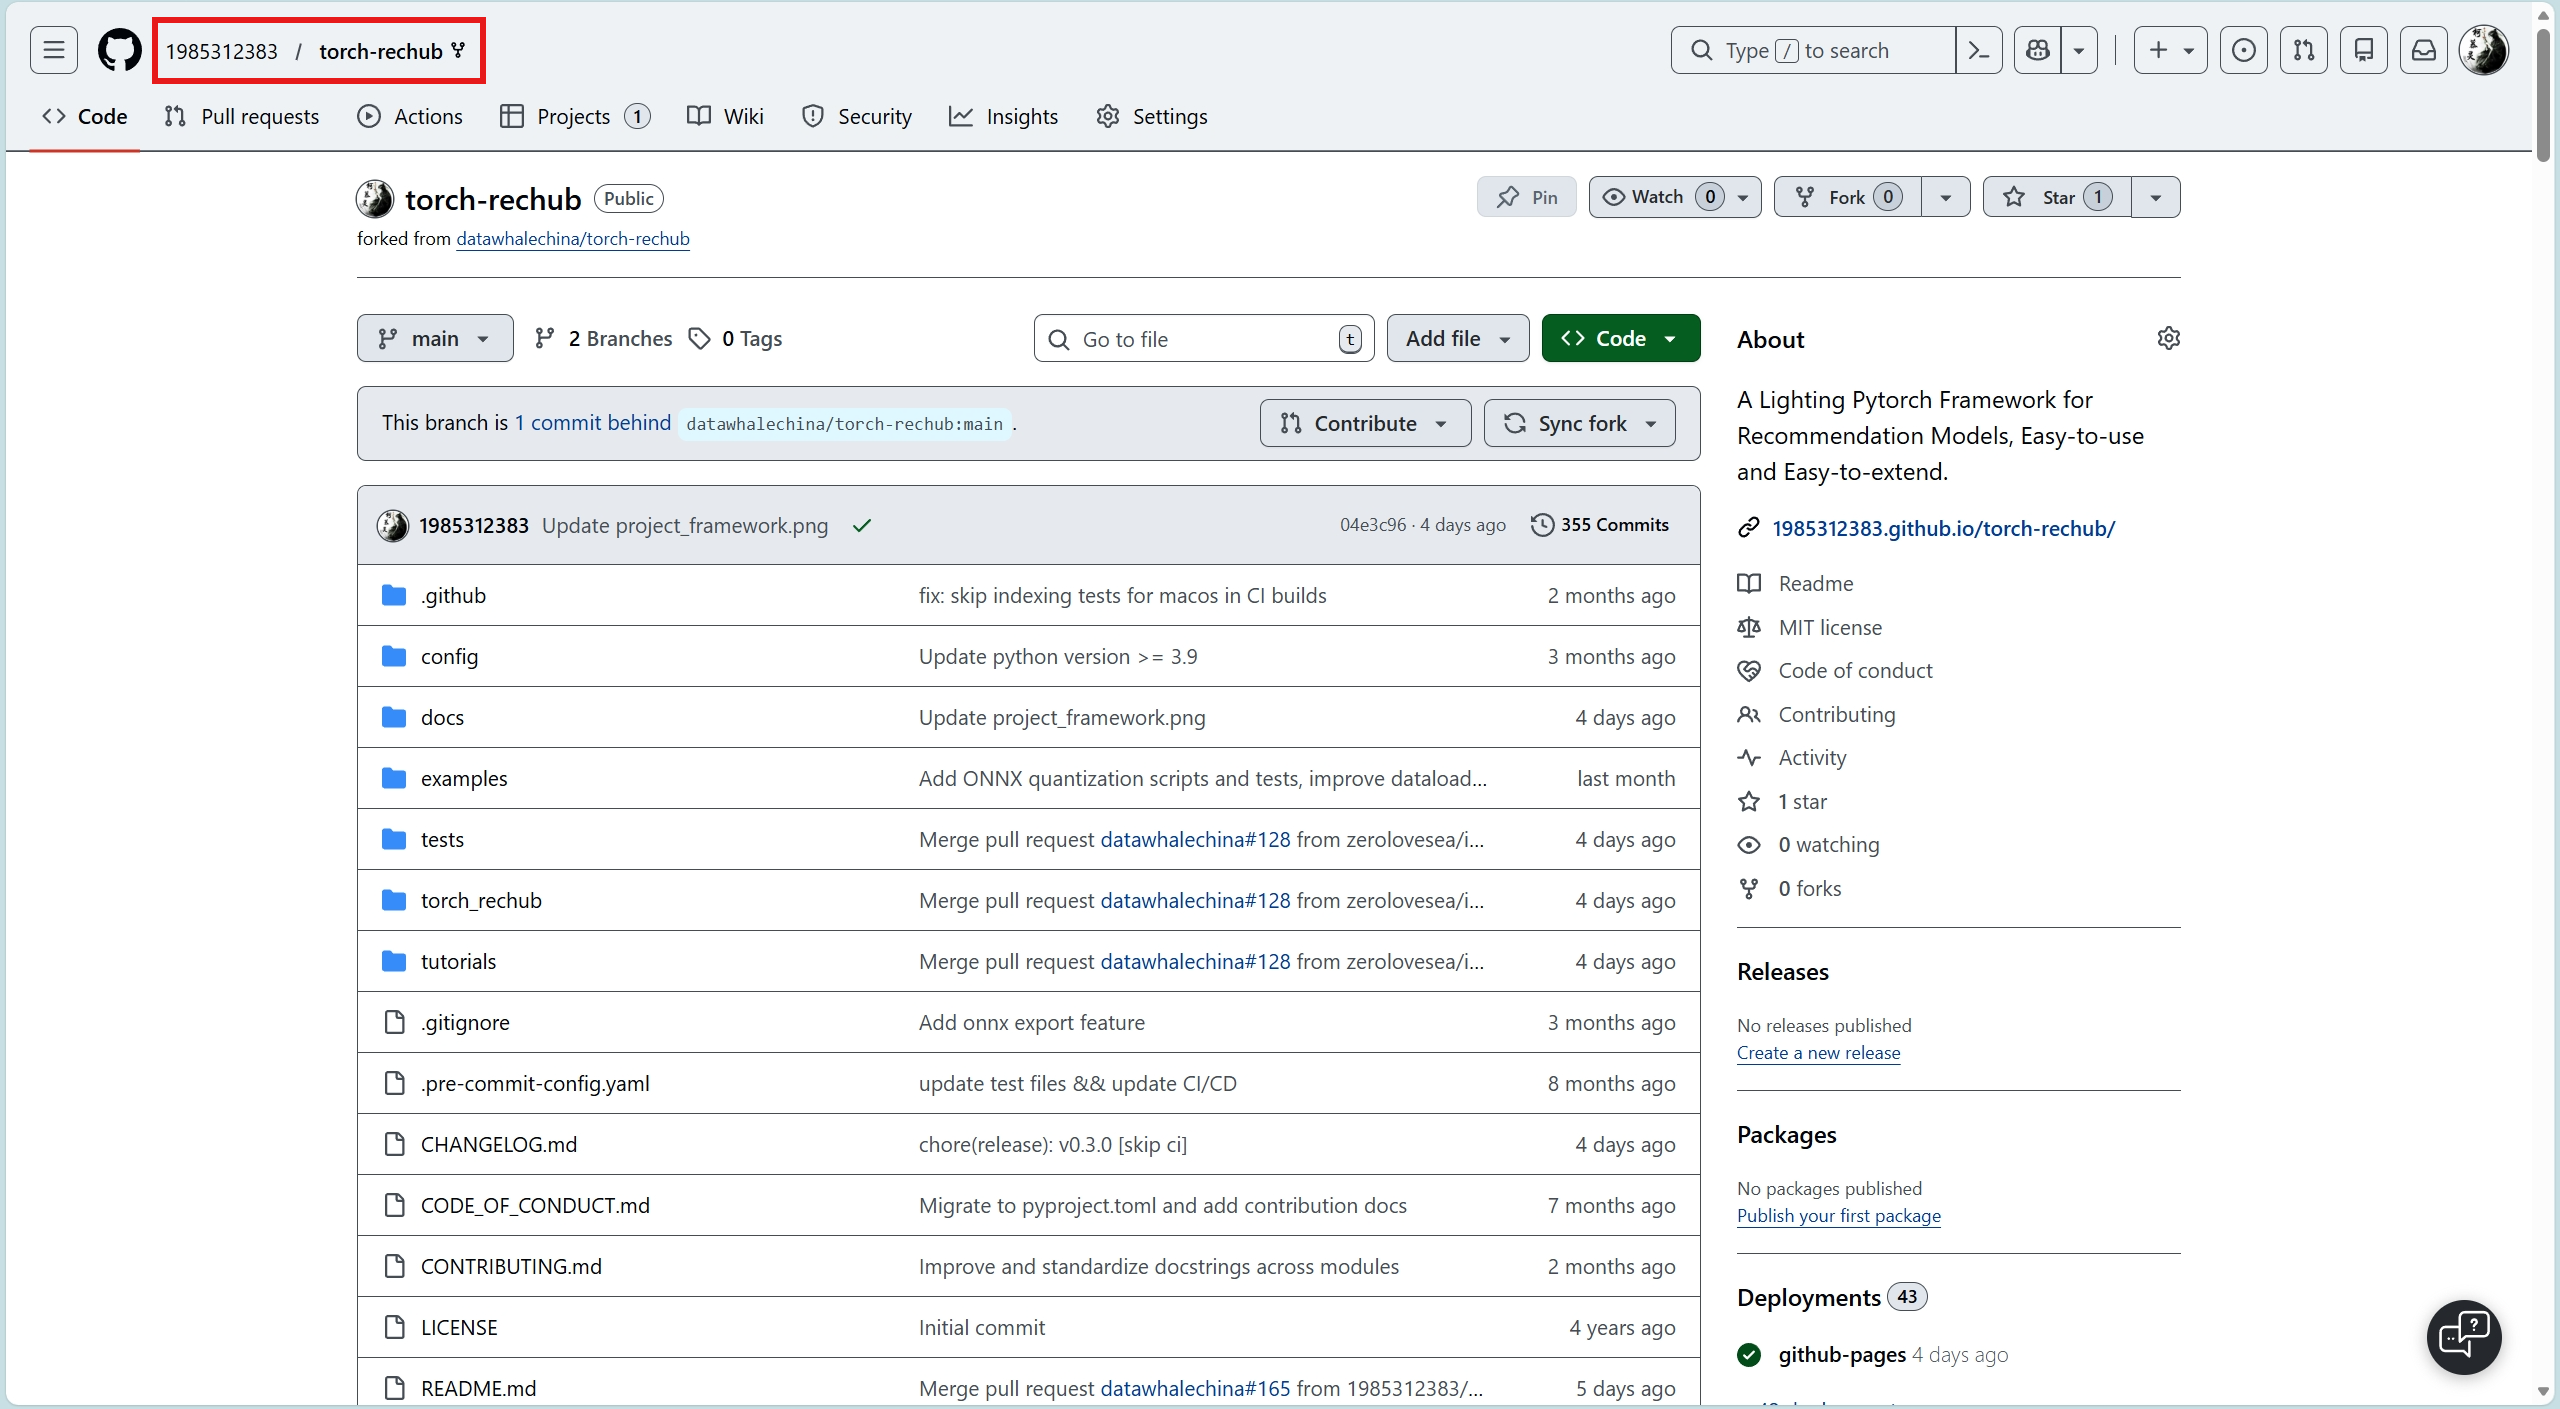
git push origin main1. Open your forked repository page on GitHub
2. If behind upstream, you'll see "This branch is X commits behind"
3. Click Sync fork → Update branch to sync with one click1. Switch to the main branch
2. Click Branch → Merge into current branch
3. Select upstream/main
4. After merging, click Push originIf your feature branch also needs the latest upstream changes:
git checkout feat/add-search-feature
git rebase main
Handling Conflicts
If conflicts occur during rebase, Git will pause and prompt you to resolve them manually. After resolving:
git add conflicted-file
git rebase --continue
Next Step
Your code is committed, but how do you write a proper commit message? See Commit Conventions.